ATA-Carnet
How do you create ATA-Carnets on the Traid-platform? We have created a step-by-step guide explaining how to create an ATA-Carnet on our digital platform in no time.

Step-by-step guide
Discover how you can create ATA-Carnets in just 4 simple steps:

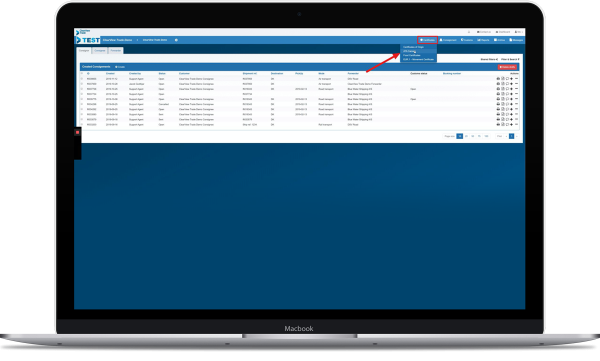
Step 1: Choose ATA-Carnet from the certificate menu at the top
- Click “Certificates” which you find in the blue bar at the top
- Choose “ATA-Carnet”

Step 2: Create a new ATA-Carnet or copy an earlier version
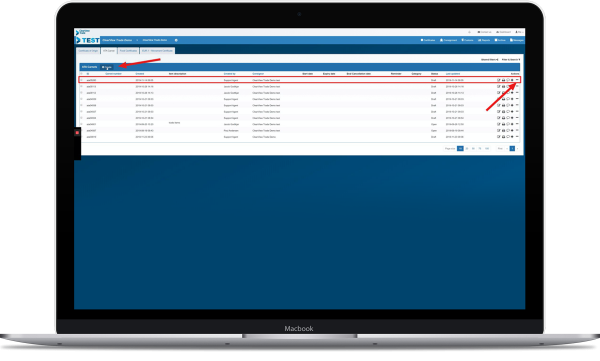
Once you have selected “ATA-Carnet” in the certificate menu, you will see an overview of your previous carnets if you have previously created an ATA-Carnet on the platform for the given company. From here you have the following two options:
- Choose “Create” in the top left corner to create a new ATA-Carnet
- Choose to copy a previously created ATA-Carnet to reuse- or adjust the information entered. This is done by clicking on the three dots under “Actions” next to the desired ATA-Carnet

Step 3: Create a new ATA-Carnet
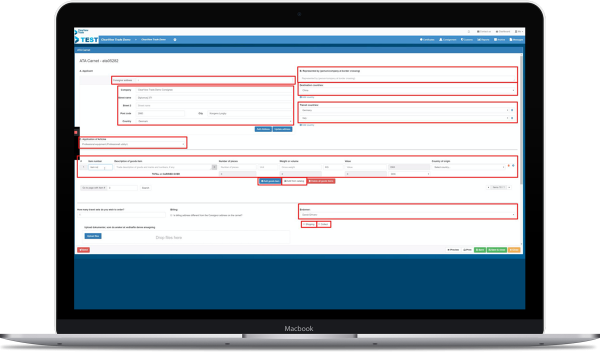
If you choose to create a new ATA-Carnet, the following information must be filled out:
- Go to “Consignor address” and choose the name of the company that is handling the shipment
- Fill out “Company”, “Street name”, “Street 2”, “Post code”, “City” and “Country” for the given company handling the shipment
- Go to “Application of Articles” and choose the application of the shipped goods
- If there is another person/company handling the shipment during the shipment, this is indicated by filling out “Represented by“
- “Destination countries” indicates the country of destination. If the consignment is going to pass through transit countries, these are indicated under “Transit countries“.
- Specify the goods and product info included in the shipment
- Add more items by either:
Adding them manually, one at a time by filling out “Add goods item”
Or, in case of multiple goods, select “Add from catalogue” from which a pre-uploaded Excel file with all goods info can be uploaded. You can always remove the goods line - Select which chamber of commerce will issue the ATA-Carnet under “Endorser“, then choose whether to ship the document – “Shipping” – or to collect the document yourself – “Collect“
- When all information is correct, select “Save” in the bottom right corner. Then select “Submit” in the bottom left corner and your ATA-Carnet application will be sent to the selected Chamber of Commerce for approval

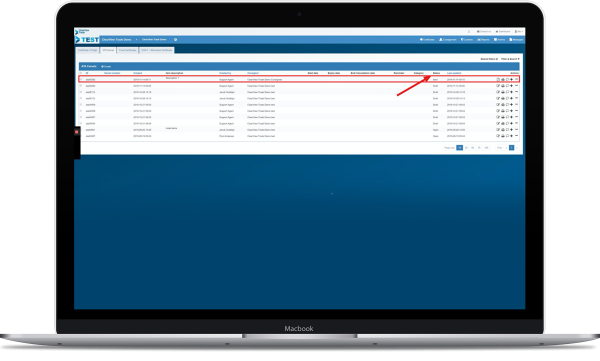
Step 4: Follow the status of the approval of your ATA-Carnet
- Your most recent ATA-Carnet application will be found at the top of this overview
- You can follow the status of all your ATA-Carnet applications under “Status” where your applications will be marked as “Sent”
Links for further information
Do you need more information about ATA-Carnets? We have a lot of information on our website that can make you a true expert on the subject. The links below will take you to our certificate page, dictionary and FAQ. Click on the three links and learn more about ATA-Carnets:
Certificates and documents
The Traid dictionary
FAQ
Book a free demo of the digital platform
If you feel like this guide was comprehensive, you are more than welcome to begin creating ATA-Carnets on the platform. You are also welcomed to book a free demo if you want further clarification on the ATA-Carnet-module.
The demo is an energetic guided online tour, and it takes about 30 minutes. Look forward to working on a platform that digitizes and automates your daily workflows.
